

You're in!
Get 10$ OFF to kickstart your first campaign.
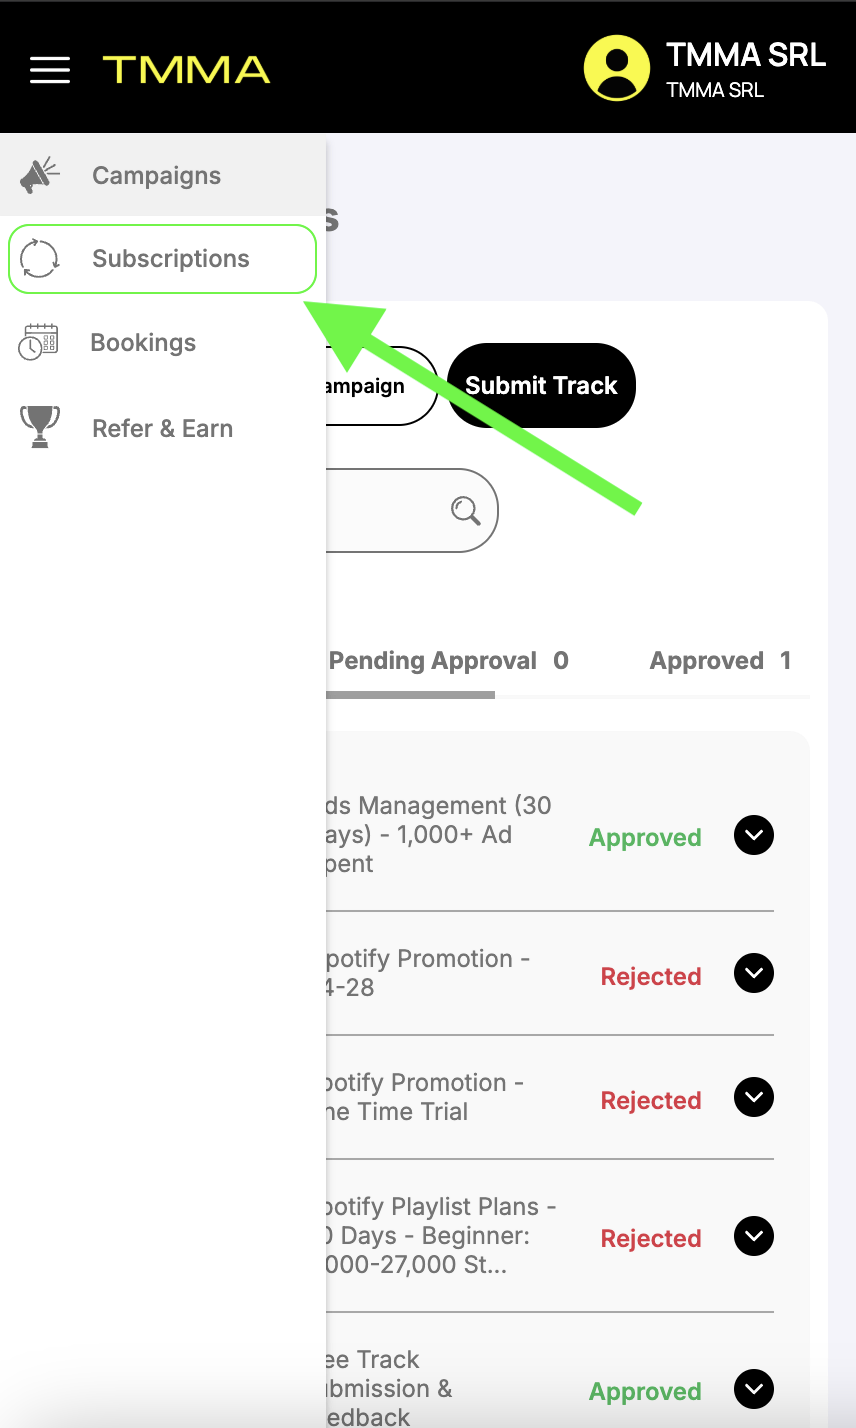
For cancelling subscription, start by accessing your account dashboard. Log in to your account using your credentials. Once you’re logged in, click on the sidebar menu located on the top left side of the screen. Then, find “Subscriptions” and click on it as shown
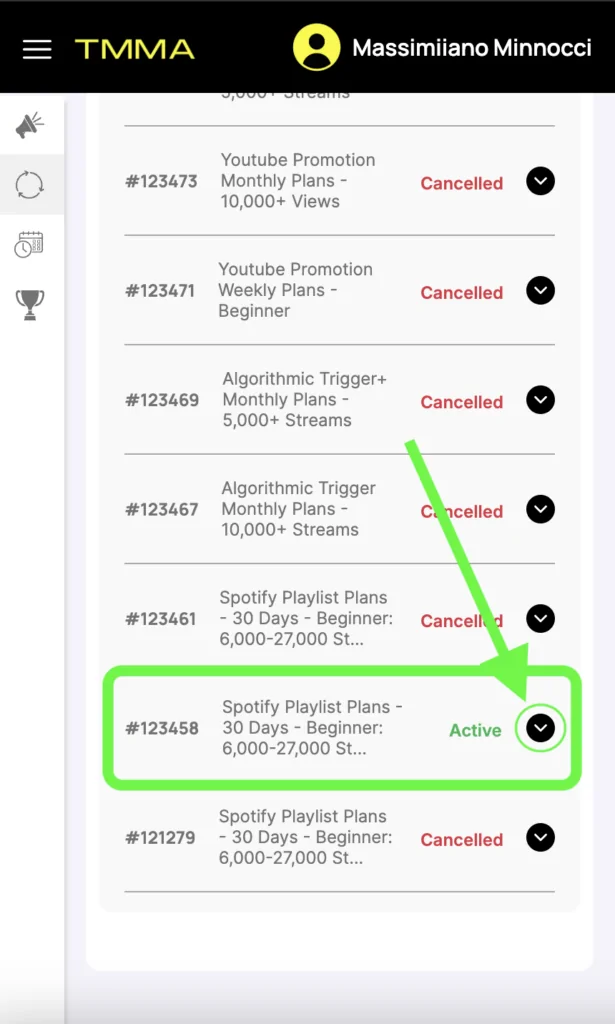
In the Subscriptions section, you will see a list of all your subscriptions. Find the specific subscription related to the campaign you want to edit and click on the corresponding dropdown arrow. This action will show you the campaign details. Use the provided photo to help locate the button for the desired subscription.
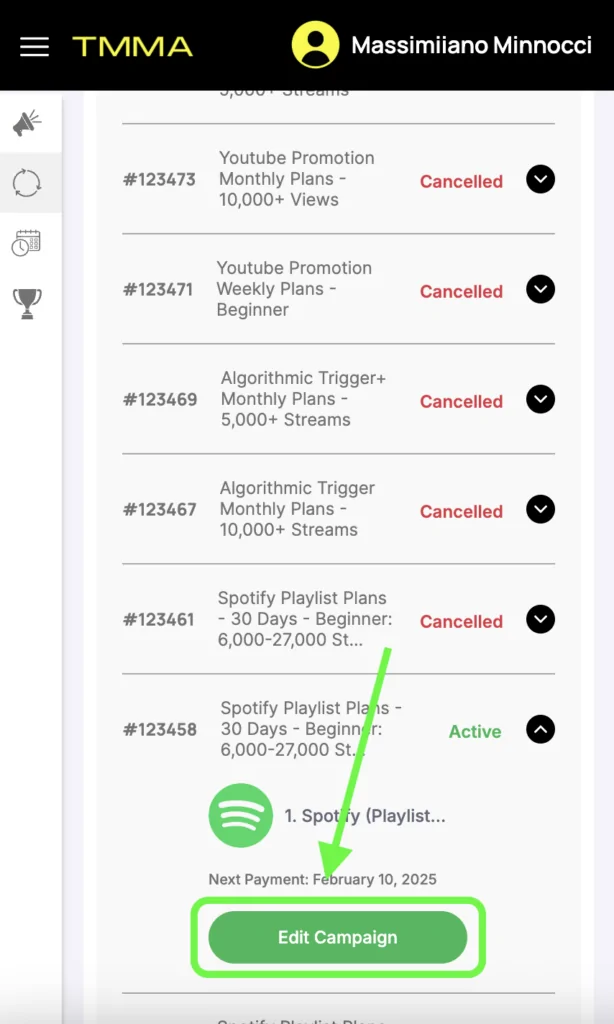
Once the subscription details show, you can find information about the selected subscription, including its duration and renewal date. To initiate the process, click on the “Edit Campaign” option.
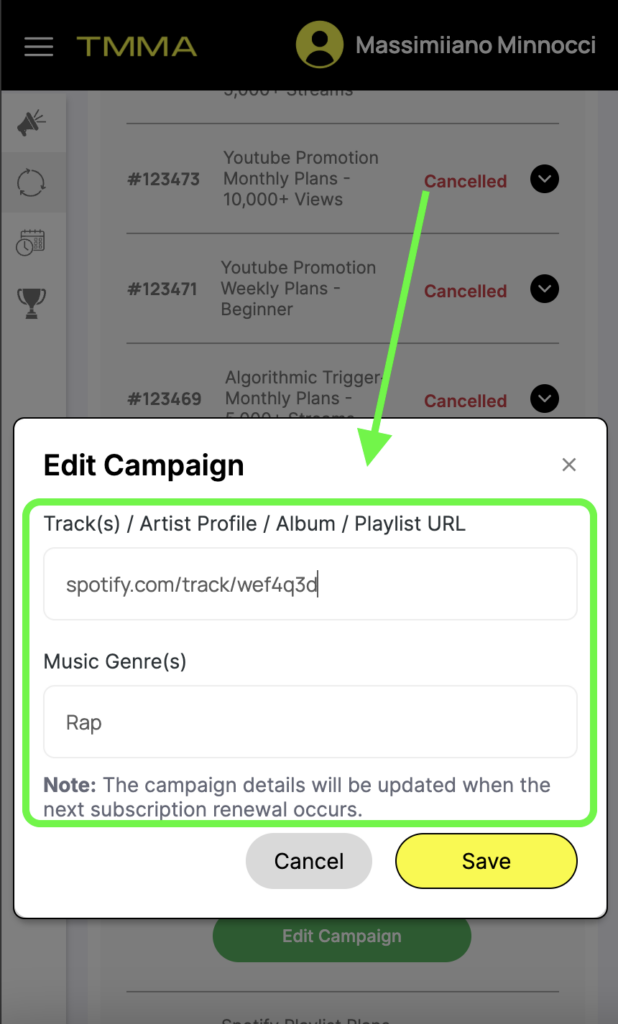
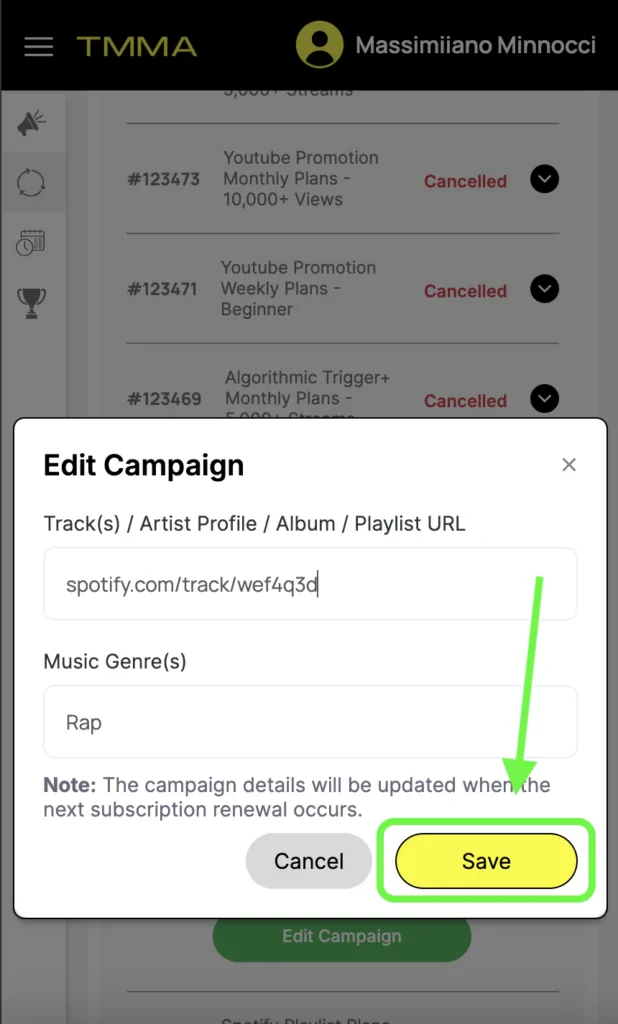
In the provided text field, input the new data that you want to include in the campaign. You can type or paste the text directly into the editor.
Once you are satisfied with the new data and links, click on the “Save” button within the data editor. Your changes will be saved, and the campaign will be updated with the revised content and links on the next renewal period.
Social Chat is free, download and try it now here!